Sunday, April 2, 2023

6 Top Party Trends for Summer 2023

 As we move into summer party season, it's time to start looking at the latest party trends that are sure to be a hit in the coming year. From new and exciting themes to innovative décor and entertainment options, here are the top party trends for summer 2023:


1-    Sustainable Parties Sustainability is becoming an increasingly important trend in all areas of life, and parties are no exception. In 2023, we can expect to see more people embracing eco-friendly party planning, from using paper-based biodegradable or compostable decorations to serving sustainable food and drinks.


2-     Virtual Parties With the rise of technology, virtual parties have become increasingly popular in recent years. This trend is set to continue into 2023, with more people hosting virtual parties to connect with friends and family who are far away. From virtual dance parties to online game nights, there are plenty of ways to make virtual parties just as fun and exciting as in-person events.  Consider sending out matching cupcake wrappers and toppers prior to the event for each guest to decorate their own goodies before the big day.


3-     Unique Themes Tried and true party themes like a “luau beach party” or “princess birthday” are here to stay however, we are seeing more creative and unique themes popping up more regularly. Consider an "80s throwback party," "underwater wonderland," or "enchanted forest" theme.


4-     Interactive Entertainment While DJs and live music will always be popular entertainment options, interactive entertainment is set to take center stage in 2023. From virtual reality experiences to escape rooms and interactive performances, guests will be able to immerse themselves in a wide range of fun and engaging activities.


5-     Bold Color Schemes This summer we can expect to see more parties embracing bold and bright color schemes, such as neon colors and metallics. These vibrant colors will be used in everything from decorations to food and drinks, creating a fun and exciting atmosphere. 


6-     Creative Food and Drinks Finally, food and drinks will continue to be a key focus of parties this summer. From custom cocktails to gourmet bites and artisanal desserts, guests can expect to indulge in a range of creative and delicious food and drinks at parties throughout the year.  Cupcakes are replacing the standard cake and candy buffets are still a popular favorite. Try swapping out traditional candies for something new!


Overall, 2023 is standing tall as a year of creativity, innovation, and sustainability in the world of party planning. Whether you're planning a small gathering or a large event, these trends are sure to inspire you to create a party that is both memorable and enjoyable for everyone involved.


Thursday, September 26, 2019

Let's Celebrate!

Because of your loyal support, Your Little Cupcake is in the TOP 3% of all Etsy shops world wide.  THANK YOU! 

To celebrate, we are giving away a set of toppers and wrappers in your choice of theme.  This will include enough sets to fully decorate one dozen little sweets. 

How do you get in on this grand giveaway? Easy. Like and comment on our TOP 3% Facebook post at https://www.facebook.com/yourlittlecupcake 

A winner will be randomly selected from those comments and likes and will be announced October 1, 2019. 
Don't forget to share our Facebook page and 
Don't forget to Keep Life Sweet!
-Chelsea


Sunday, February 24, 2019

Underwater Marshmallows


One of my favorite party treats are easily these underwater themed, chocolate covered marshmallows. They are so simple to make and always a super hit with the kids. 

 -Skewer the marshmallows with party picks, lollipop sticks, or mini kabob skewers.


-Melt light blue chocolate wafers in the microwave.  I usually do a cup of wafers in 20 second increments, stirring in between. Be sure to follow the directions for the brand of wafers you are using and remember that both the chocolate and bowl will be hot.


-Dip the skewered marshmallows into the melted chocolate and give them a good swirl to drip off any extra chocolate. 


-Place them upright in either crumbled graham crackers or light brown sugar for the sandy bottom. 


-While the chocolate is still slightly melty, add a graham goldfish cracker and a few pearlescent baking sprinkles for bubbles.


-Let dry completely on parchment paper of cookie sheet either on the counter or in fridge if need be.


And done! My older children loved helping with these just remember that the chocolate, and the bowl they are being melted in, will get hot.

Tuesday, February 2, 2016

Wedding color trend of 2016

Wedding season is just around the corner and although 2016 is sure to delight with an array of unique trends, so far couples seem to be opting for near traditional color palettes. Take a look at this palette that has been making trends for years and will sure to be back on the scene in 2016.

Photo from OneFabDay.com

Tuesday, January 19, 2016

5 Delicious Cupcake Outfits

 With Valentine’s Day just around the corner it is time to start thinking about adding a little something sweet to your family’s lives. Check out these great ideas for gussying up some simple cupcakes.
These wrappers add to the sweetness of any cupcake. They can come in any combination of colors you would like.

You're a HOOT Valentine!

Hugs and kisses wrappers add simple pizzazz.

By far one of the most popular Valentine's Day themed toppers, these hearts can come in any color you would like.

 I love using these Alice in Wonderland inspired wrappers for Valentine's day. Customize both the inner and outer colors to create something unique.

Check out all of our Valentine's and Heart options at Your Little Cupcake

Thursday, January 14, 2016

Party Planning Made Easy

Growing up, one of my favorite days of the year was always my birthday. The thought of a day made especially for me gave me so much joy and excitement; feelings I have cherished ever since. But as I have grown older the excitement isn't quite the same. I am not unique in this sense; most children get excited by the thought of their birthday, while many adults think of it as just another day. What better way to foster this youthful excitement than a party just for them?

Party planning can be very time consuming if you let it and throwing a party can be very expensive if you don't spend sufficient effort planning ahead of time. I like to start several months before, but in reality a few weeks would be just fine.


Where to start?

Having a preset budget is very important to planning a successful party. Your budget will help determine the length of the guest list, the venue, the food, and many other details for your event. I have seen, and thrown, some very successful parties on very low budgets and have also seen parties being thrown with unlimited budgets that were complete flops. The budget does not make or break a party.


Choosing a venue

Traditionally a child's birthday party was always held in the home, but it has become more and more common for business to offer party packages where they supply the venue, entertainment, and sometimes even food. These packages are often more expensive than having an at-home party but they do take much of the work out of planning. Do a search for local trampoline parks, swimming pools, movie theaters, and even zoos to find businesses that offer these services in your area. Be sure not to choose something too far away so you don't put your guests in a situation where they have to drive a long distance to get to the party.
  
Choose a date

At the beginning of my party planning I like to pick two or three dates that I feel will work best for the party. I find the most convenient day for us, and our guests, always seem to be Saturday as to not interrupt the work week or Sunday church services. I rarely choose an exact date until a few weeks before the event, when I create the invitations. This allows for input and flexibility for the guests. (Especially those special friends who are willing to help with setup and tear down). If you are having a party at a business you might be very limited with the dates available. Some places book up very quickly, especially seasonal locales. Be sure to plan several weeks ahead and be flexible.

How big do you want your party to be?

Some adults are very comfortable entertaining a large group of people while others prefer to celebrate with just a few close friends. This is the same with children. Some children will love the idea of inviting their whole class, while others will prefer to have just their close friends. Too many people can be very overwhelming for both the children and adults involved. This is where a preset budget really comes in handy: more people means more mouths to feed, more minds to entertain, and more money spent. Sit down with your child and start a list of who they would like to come. Give them a set number of people they can invite and stick to it. If you are purchasing a party package at a business, the number of people attending might be designated by them already so be sure to do your research first.

For us, this is where we spend most of our budget. We like to invite their whole class and we always encourage parents AND siblings to stay. We hosted over seventy kiddos, parents, and younger siblings in our home for a seventh birthday- and it rocked! My children are very close in age and often have the same group of friends who have same aged siblings. This is a very important thing for our family but may not be right for you and your child.

Choosing a theme

Choosing a theme is very important not only because it ties the party together but also because it will give you a basic guideline and makes planning much easier for you. For a first or second birthday you will likely be in charge of this task, but allowing an older child to help pick out the theme of their special day will enrich the experience for them that much more. A good technique is to make a list of three or four themes that you prefer then allow the child to pick from that list. This will ensure that you don't end up planning a party around a pink and teal zebra from outer space and it gives the child a sense of participation and empowerment. The theme can be a character or activity that your child loves or even just a trio of their favorite colors.
Need some theme ideas? Check out my Etsy shop! Your Little Cupcake

Sending out invites

I make my own invites with the help of the birthday child. I like the invites to reflect the theme of the party as well as my child's personality. If making the invites isn't your cup of tea there are many websites like mine that will customize your invites for you. When giving out invites be sure to allow at least a week prior to the event for the guests to receive them, and R.S.V.P. Don't forget: if you are putting them in the mail you will need to leave an extra few days for the shipping time as well. We like to give out our invites two weeks before hand.

WHAT'S NEXT?
Food
Decorations
Games
Favor Bags
Helpful Gnomes, or other friends
Tuesday, November 26, 2013

Macaroni Garlands


The other day my 5 year old was asked by another parent if her favorite part of Christmas was getting presents. My daughter looked at her and said gifts are okay but my favorite part is baking cookies and doing Christmas crafts. It is little moments like that, that reassure me that I am doing something right.


 Here is a great traditional craft to do with your kids, both young and old.


1 box of any tube pasta
Food coloring of your choice
Water

Mixing bowls
Cookie sheets

Ribbon, string, or yarn


Divide the pasta into separate bowls. We chose to do red and green for our Christmas garlands. Add a little bit of water to each bowl. We used about a teaspoon for half of the box. Add food coloring until you get your desired color and mix well. Be careful, I ended up splashing the water and food coloring up my whole arm because I was over eager.

Once the pasta is completely covered spread it out on a cookie sheet in a single layer and leave it to dry at least a few hours, overnight is even better. If you are in a hurry you can put the cookie sheets into the oven at the lowest sitting for a few minutes be sure to watch them closely and don’t leave them unattended.

 Once dry, let your little ones at it. Use either heavy plastic needles or just tape the end of your yarn for easier stringing. Be sure to help them tie a knot on the first piece on so they don’t just fall off the other end.

The best part about this project is that if you have any leftover noodles just toss them into a pot of boiling water and you will have a fun and festive lunch.

Wednesday, June 19, 2013

Lightening Glow Bugs

With summer in full bloom it is very easy for younger kids to get antsy and out of routine. I am always on the lookout for fun and unique craft projects that tie into what we are learning in our weekly summer reading themes.
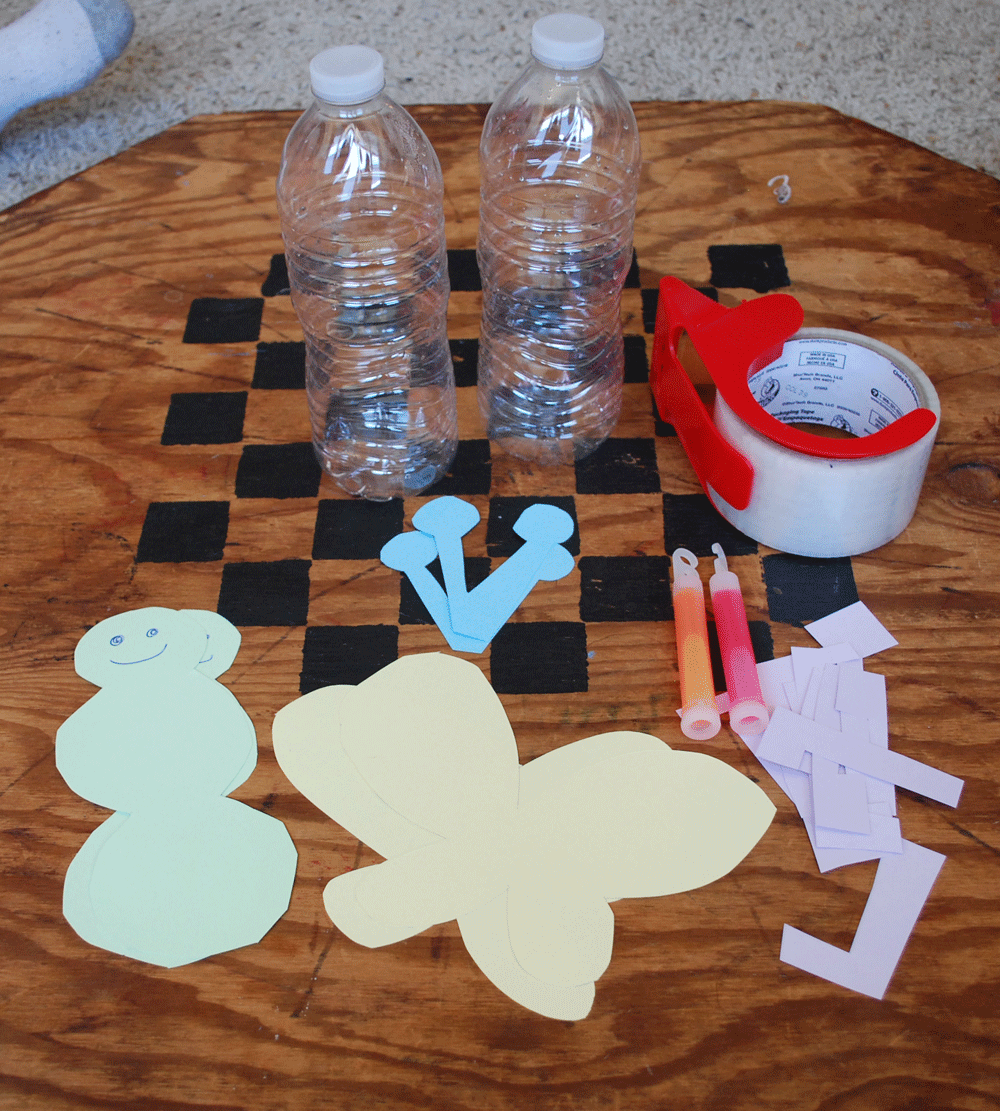
This week we are studying insects and spiders and I found this great little project to make lightening bugs.


What you need:
Small empty disposable water bottle
Tape or glue
Construction paper in various colors or a printed copy of attached template
Glow stick

Since we did this project in the middle of our classroom time I found it easier to cut everything out beforehand but a child with a few scissor skills would benefit from the practice.

To start you will need to either print out the template below or hand draw your own images. If you are printing the template be sure to do a print preview to make sure you are using the printing area of your printer. You will need a three segmented body, a pair of double wings, six legs, and a pair of antennae.  
Don’t be afraid to add a little education into your craft project either. Explain to your child what makes an insect.
The head- where it has its brain and sensory organs like mouth and antennae.
The thorax- this is where its legs and wings attach. An insect has 6 legs and usually two pairs of wings.
The abdomen- this is where the heart and digestive tract are.
Don’t forget, spiders are not insects. They have eight legs and only two body segments!

Have your child tape or glue the main body to the front of their empty water bottle. Next have them line of the wings in the back of the bottle and attach those as well.  Help attach the antennae to the back of the head and the legs to the thorax. Be sure to help your child understand that the legs attach to the middle segment of their body.
We drew faces on our little bugs as well as decorated their wings.
Lastly, activate your glow stick by gently snapping it and drop it into your bottle. Be sure to tightly close the bottles top again and let your little buggers go play with their new lightening glow bugs.


These are great on camping trips to run around with or hang from the top of a tent. 

Tuesday, July 10, 2012

Home made Graham Crackers

We've been trying to take out processed foods from our diet for awhile now but it very trying with young kids. It is so easy to reach for those bags of fun shaped fishy crackers or fruit snacks as you run out the door. But have you ever stopped and looked at the ingredients in those things. Most of them are unrecognizable.

My brother came for a visit last week and pointed out that the fruit snacks that I was giving my toddlers were closer to gasoline and plastic than something edible. I made the mistake of looking the ingredients up online to see what they real were, he was right.

Luckily, I have a vault full of kid friendly recipes that I have been collecting for years. most of them I have never gotten around to testing.

This recipe for homemade graham crackers has been on the top of the stack for months now. I love recipes like this because it is easy enough that my 2 and 4 year old can help with in the kitchen and I can teach it to my teens to lock away in their memory banks.

All you need is:
  • 2 cups whole wheat flour
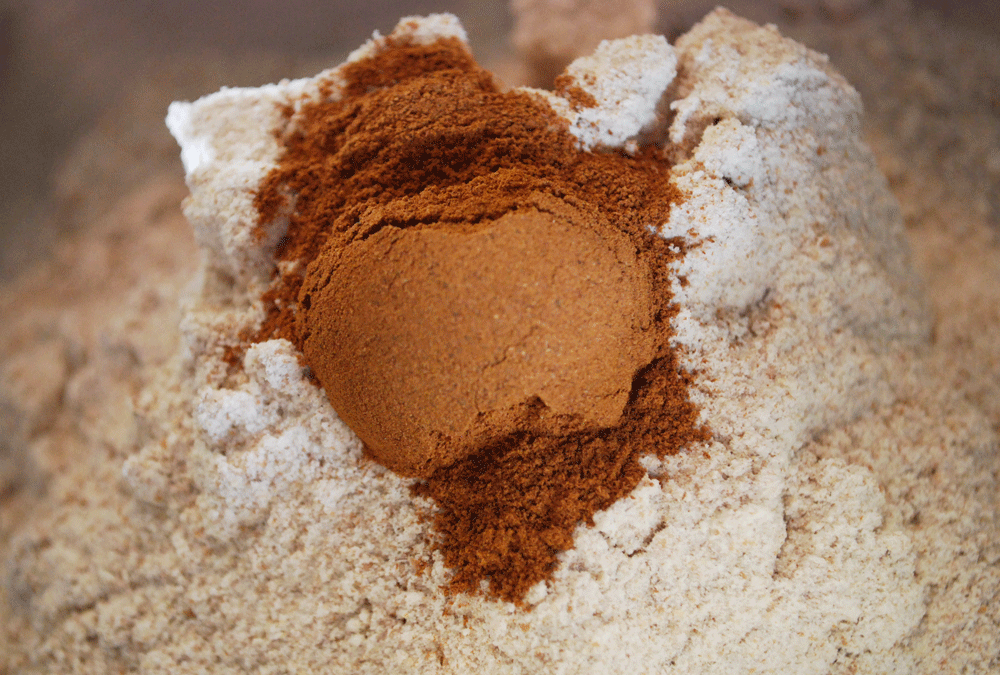
  • 1 tsp cinnamon
  • 1/2 tsp baking powder
  • 1.2 tsp baking soda
  • 1/2 cup melted butter
  • 1/2 cup honey
Preheat your oven to 400 degrees. Mix all the dry ingredients in a medium bowl. Melt the butter in a 1 cup microwavable measuring cup, once melted add your honey and mix together well. Add your wet ingredients to your dry ingredients and combine completely.

Drop the dough onto an ungreased cookie sheet, one with sides is best rather than a flat one. Using a rolling pin, smooth glass, or even just the palms of your hands roll the dough out filling the pan evenly. It might feel really thin but don't worry, they do rise int he oven.

Bake for 9 to 12 minutes depending on how crispy you like them. My daughter prefers her chewy and soft while my son likes his super crispy so we usually have to make two batches.

Once your cookies are out of the oven cut them immediately and remove them from the pan onto a cooling rack.

Once cooled the cookies will crisp up a bit so don't over bake. Once dry these make awesome smores! Microwave a marshmallow for 20 seconds and sandwich it with a bit of chocolate for a super yummy and quick indoor treat.

***Want a little more pizazz? Add a little bit of vanilla extract to your wet ingredients before combining or mix a tsp of sugar and 1/2 tsp of cinnamon together to sprinkler on top of the dough right before it goes into the oven.

***Instead of a cookie sheet press down a small amount into the bottom of a cupcake pan and decrease you baking time to 5 to 8 minutes. These create perfect little circles which you can top with fresh fruit and homemade whipped cream or a dollop of ice cream.


Friday, June 8, 2012

Mountain Dew Jelly. Perfect for Father's Day

Looking for an AWESOME Father’s Day gift? Why not Mountain Dew Jelly? Yeah, you read that correctly. Slather his morning toast with Mountain Dew Jelly. This activity is a little too much for the little ones. In fact, my 14 year old and I made this together this morning for my husband’s birthday and we are slightly lucky we didn’t burn our kitchen down.

What you need:
3 ¼ Cups Mountain Dew
2 Tablespoons lemon juice
4 ½ Cups sugar
1 package Sure-Jell or Certo pectin
Lidded canning jars, 3 large or 6 small

***Have your ingredients measured out, you jars cleaned and ready, and read all directions on both this and your pectin package beforehand because things move rapidly***
Pour the Dew and lemon juice together in a large pot. A good size spaghetti pot will be best to make sure you don’t boil over.
Over medium high heat bring this mixture to a boil and boil for 3 minutes while actively stirring.
Let mixture cool slightly, just a few minutes.
At this point you want to follow the directions on your pectin package. The run down is that over medium high heat you will gradually mix the sugar into the Dew mixture while CONSTANTLY stirring. You want to make sure that they sugar is completely dissolved before moving on. You will need to boil your mixture for 1 minute before adding the pectin in. Again, follow the directions on your pectin package for best results.
When the mixture is complete quickly pour it into your already cleaned and ready to go jars and screw the lids on.
Let the closed jars sit on the counter overnight then store them in your fridge.
For those of you who are canning pros you can soak your lidded jars in your boiling water bath for 10 minutes and when done properly your jelly can last for a year in a cool dark cabinet.

Tuesday, May 22, 2012

Easy Air Dry Clay

What you need:
·         2 Cups Baking Soda
·         1 Cup Cornstarch
·         1 ½ cups water
·         Small pot
·         Wooden spoon
·         Rolling pin (optional)
·         Cookie cutters (optional)
·         Paint, crayons, glitter glue, other decorations


This recipe is super easy and so versatile! The final product air dries overnight so it can be used to make last minute gifts, Christmas ornaments, or doll house items. It is also great party activity. You can create shapes beforehand and have party goers decorate them or for a sleep over party, have the kids make their shapes when they arrive, dry them over night and decorate them before they leave the next day.

To make the dough combine the baking soda and cornstarch in the pot with no heat. Add the water and mix together. Turn the heat on medium and continually stir the mixture. You will notice after a few minutes that it will start to clump together and eventually will become a solid mass, the texture of play dough. At this point take it off the heat and let it sit for a few minutes until the mixture is cool enough to handle.

Remove from the pot and knead on a flat surface for about 5 minutes or until smooth. The mixture will feel slightly sticky but don’t worry, as it cools that stickiness goes away.

At this point, as long as the dough is cool to the touch, it is ready to be used. You can use it right away or put it in an air tight container to use later.

We like to use a rolling pin to flatten the dough and use cookie cutters to cut out shapes. My daughter makes gingerbread girls to use year round in her doll house. If making ornaments be sure to make holes in the tops to add hangers while the dough is still wet.

Let your creations sit out overnight to dry. We found that some of them cracked a bit here and there but felt it added to the handmade feel.

When dry use anything and everything to decorate. My littlest prefers crayons but we have tried temper paints, glitter glue, and even food coloring before. Use whatever you have around the house already.


Friday, May 18, 2012

Foamy Finger Paint


it in about a tablespoon of water before adding it to the foamy mixture. This added great color and didn’t leave a trace in the tub.
Foamy Finger Paint
What you need:
1 bar ivory soap
½ cup water, soap dye, or food coloring
Mixing bowl
Whisk
Small dishes for separating colors


Grate the soap into the bowl and add the water. Whisk  until it is the texture of shaving cream, about 2 minutes. The longer you mix the smoother the final paint will be.

If you want to make more than one color you need to separate the soap into several dishes at this point.
Whisk
Add a few drops of your choice of coloring agent to each container and mix well. For something a little different, mix the color only half way to give a marbling effect.

We set out sheets of freezer paper and let the kiddos go at it. When they had painted their little hearts out, clean-up was a cinch, we just had an early bath time. And the best part, they were already pre-soaped.

My teenagers had a great time with this project as well. They discovered that if they painted something then scraped the extra foam off the paper had a rainbowed marble effect which they could then paint something on top.

In addition, we need to give huge props to Ivory soap for really being able to get things clean. We found when color mixing that yellow and blue made green, pink and yellow made orange, but when you mixed all three together for long enough, it turned white again.

The first time we made this paint we wanted to use it as a bath tub paint but were hesitant about using food dye on the tub grout. Instead we took a Crayola tub tint and completely dissolved it in about a tablespoon of water then added it to the foam. This worked wonders.

If you manage to have any foam left over it stores wonderful in any airtight container. And on a final note, although it looks like yummy, sweet, and sugary cotton candy. My little ones tell me it doesn't taste so hot.

Enjoy! 
We set out sheets of freezer paper in the hallway and let the kids go at it. When the little ones are done painting
*
 is a cinch, just take the party to the tub, they’re already pre-soaped.
Grate the